Big shiny arcade buttons
Last post i teased the next upgrade of my smart desk project which are some big arcade buttons to control the light even when my network is down. Well…
I finished that part over the last few days:
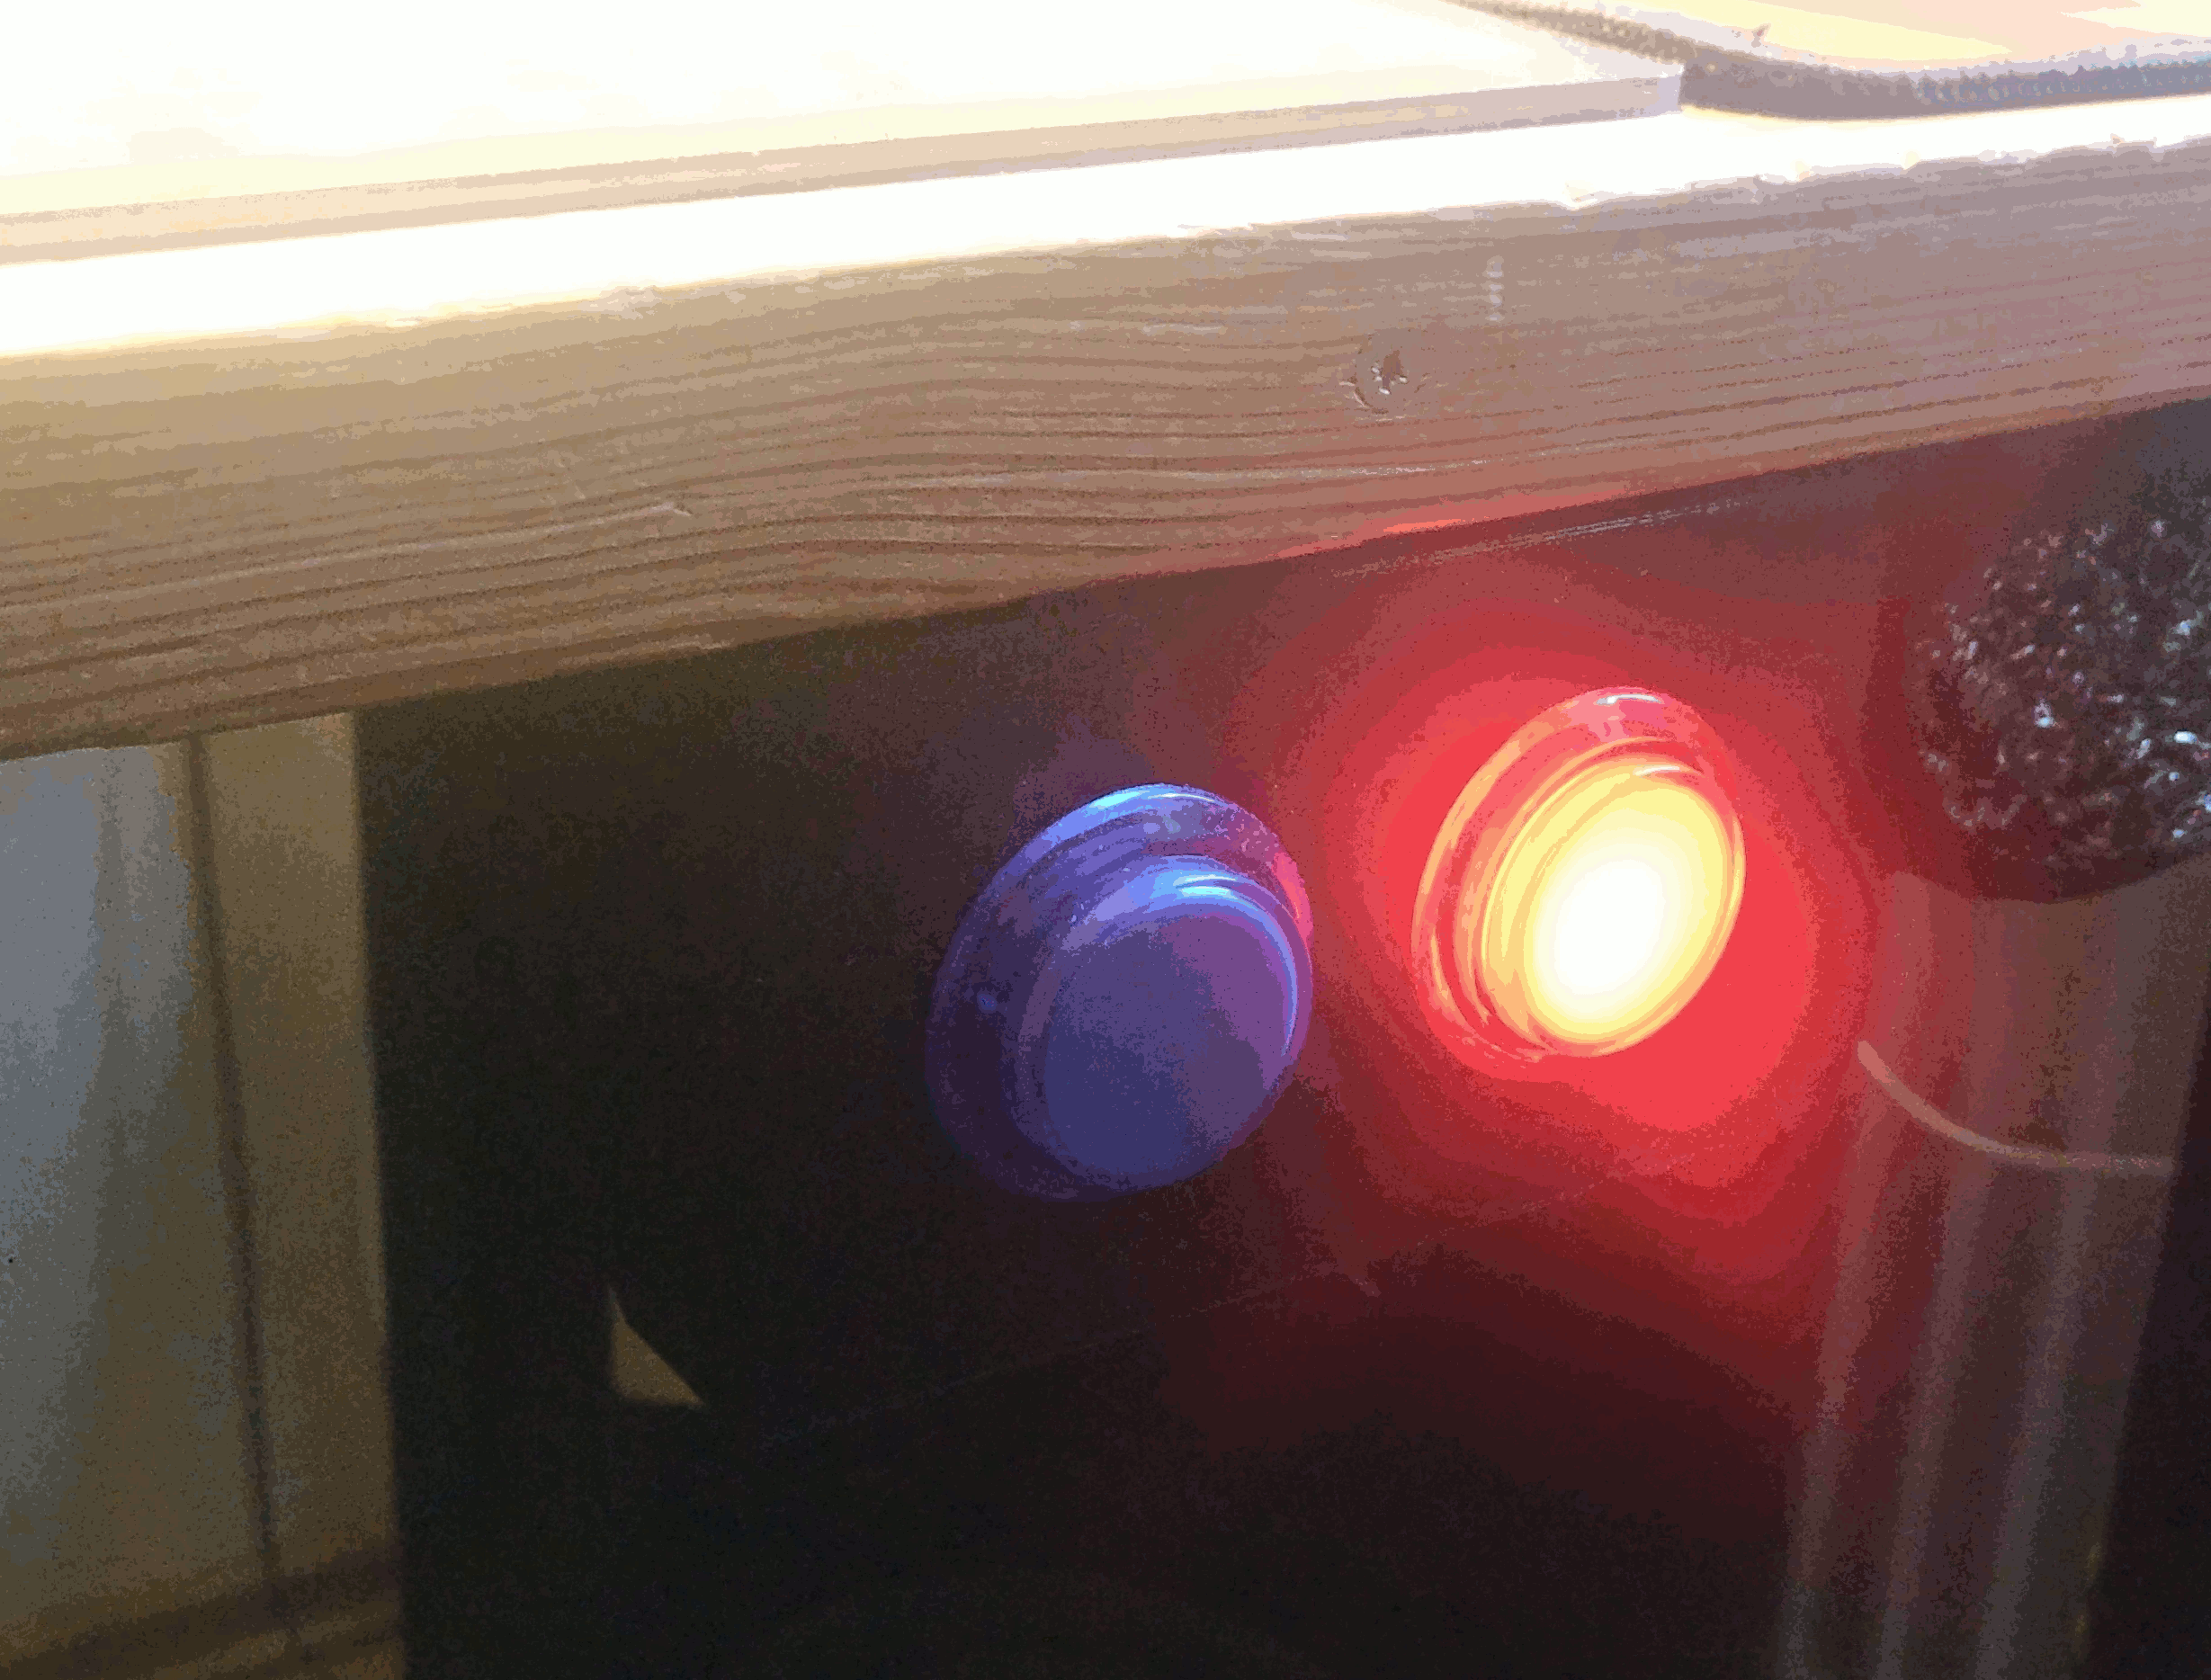
The buttons i did choose for the desk are thous big arcade buttons1 as they produce this satisfying click when pressed. They come with an integrated LED and resistor, but -as they are not supposed to be driven by a 3.3 volt microcontroller- they need 12 volt supplied to be fully lit up. For the controller i use a normal USB power supply so i tried to power the LEDs with 5 volts. That made them bright enough so i went with that…
The button comes in 2 parts which have to be assembled together. The first part is the thing you actually press (which also lets the light pass) and the second part is the Switch+LED combo. To make a neat package i modified the second part. By modified i mean i soldered a transistor to the pins to up the 3.3V logic level from the GPIOs of the controller to 5V needed for the LED. For that i just used a normal 2N2222 NPN-Transistor2.
Soldered together the switches + transistor + some cables the “thing” looks something like this:
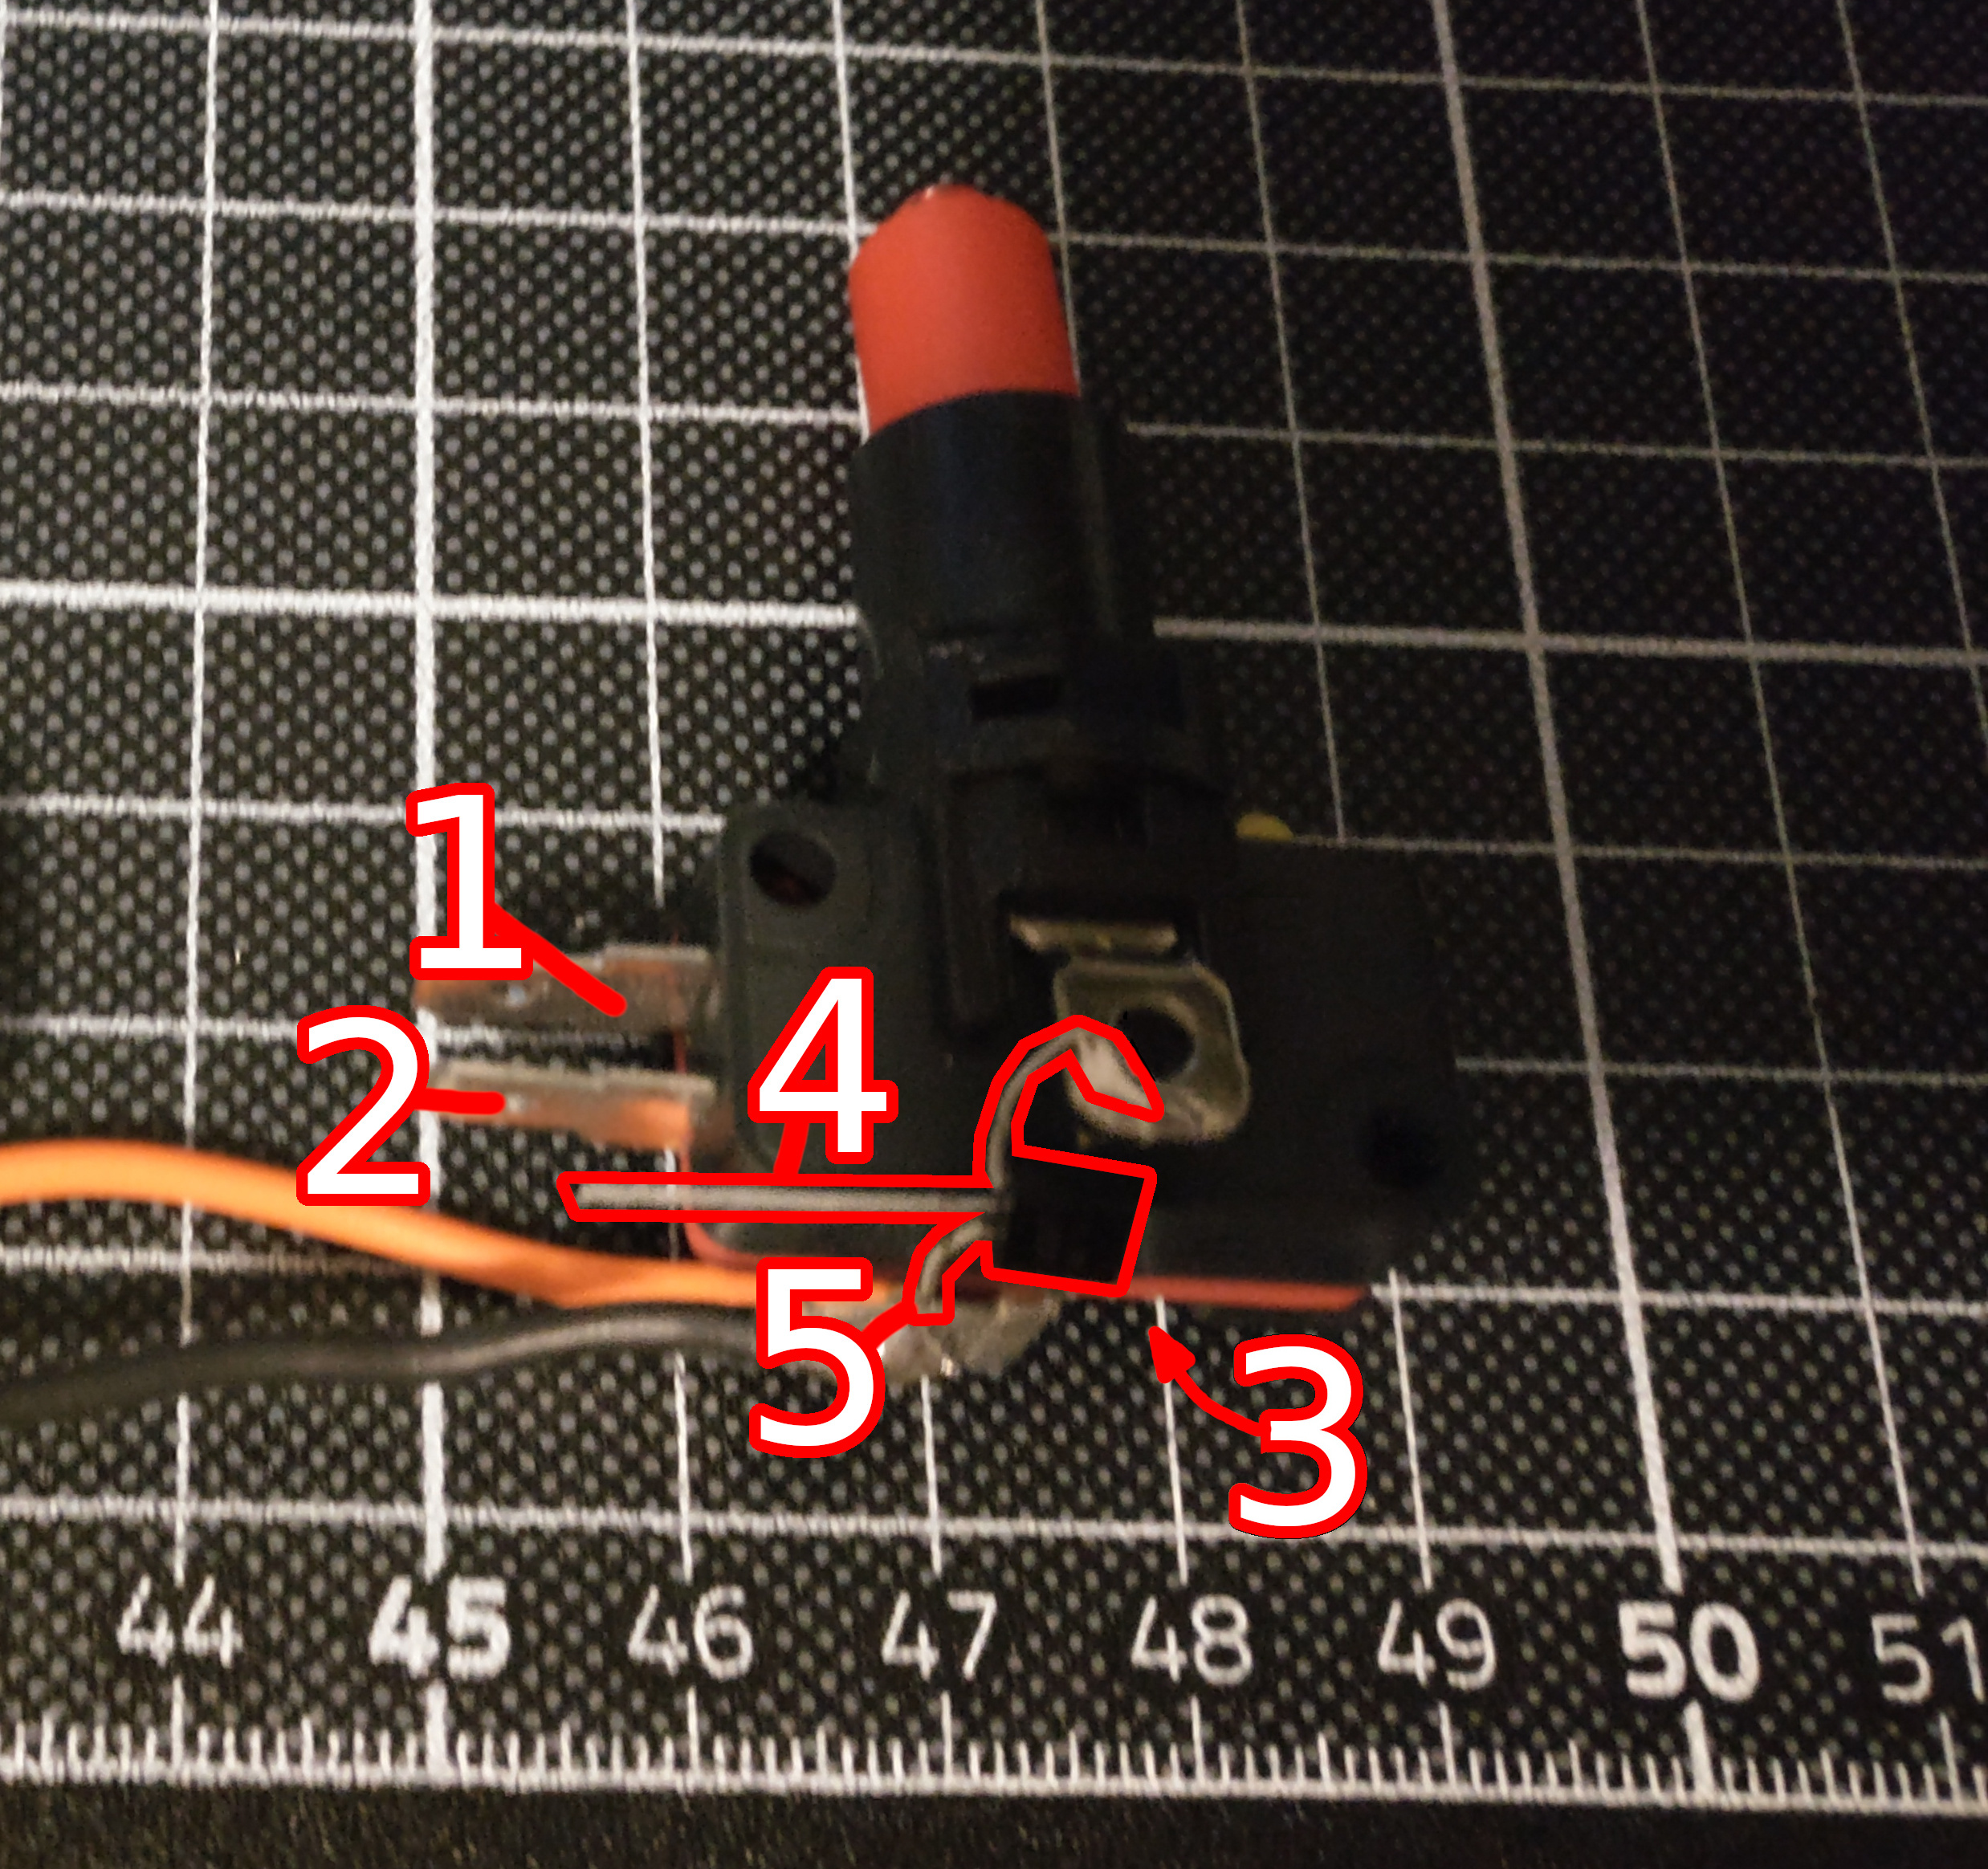
The transistor is marked red, as the photo is to potato-quality to make it out otherwise :D
| pin | connected to |
|---|---|
| 1 | GPIO (Switch) |
| 2 | 3.3V |
| 3 | 5V |
| 4 | GPIO (LED) |
| 5 | GND |
After hooking it up to the controller i had to change and add some parts of the configuration YAML of the esphome-firmware:
light:
  - platform: monochromatic
    name: "Rote Led"
    output: led_rot
    id: rotled

output:
  - platform: ledc
    id: led_rot
    pin: 14

binary_sensor:
  - platform: gpio
    pin:
      number:  12
      inverted: True
      mode: INPUT_PULLUP
    name: "ButtonRot"
    filters:
      - delayed_on: 20ms
    on_click:
      min_length: 5ms
      max_length: 500ms
      then:
        - switch.toggle: relay1

switch:
  - platform: gpio
    pin:
      number: 33
      inverted: True
    name: "Schreibtischlampe"
    id: relay1
    on_turn_on:
      then:
        - light.turn_on:
            id: rotled
            transition_length: 200ms
    on_turn_off:
      then:
        - light.turn_off:
            id: rotled
            transition_length: 500ms
The added parts in the on_turn_{on,off} sections of the switch turn the LED {on,off}. By hooking them up to the switch activation and not the button press the LEDs also turn on when the relay gets activated via the webserver. The “transition_length: …ms” parameter makes the LED fade in and out smoothly (only works on an PWM GPIO).
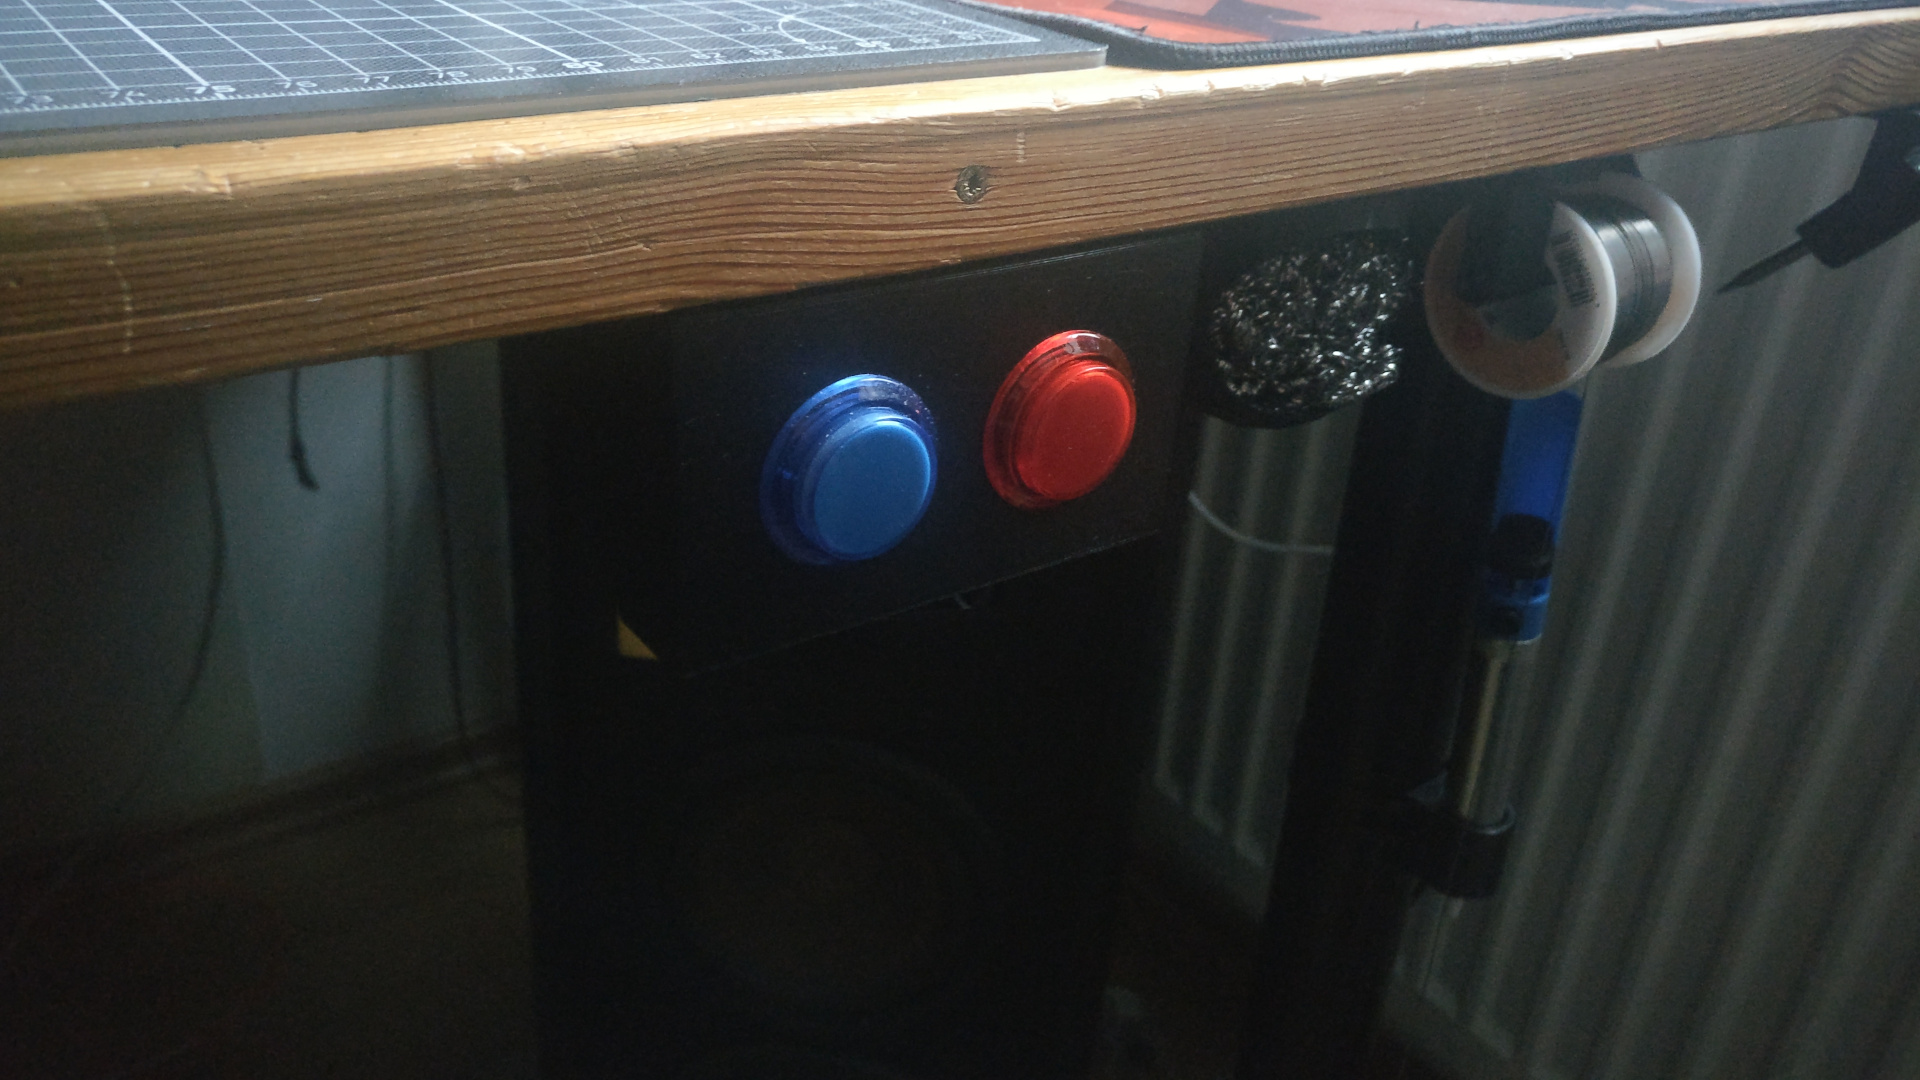
After that there only was a case to design and 3D print. I settled for the classic highly complex3 box shape design as you can see in the image above.
As you can see in the image i have another blue button next to the red one… not really sure what to do with it right now, if i come up with something i will probably do another post about it here ;)